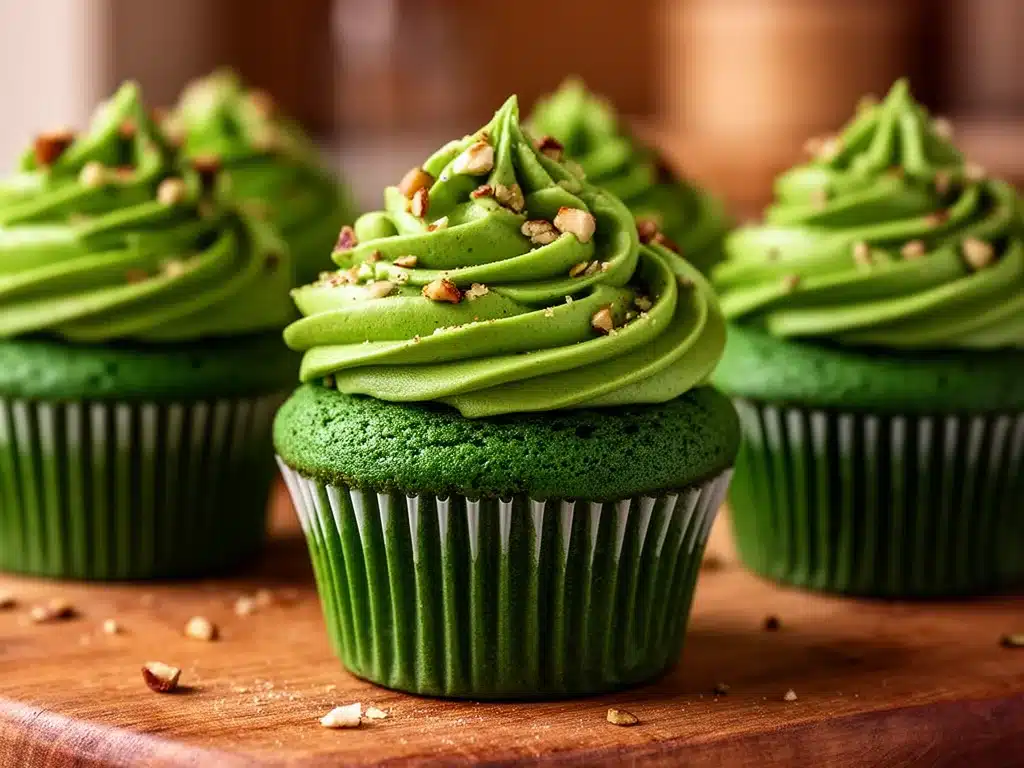
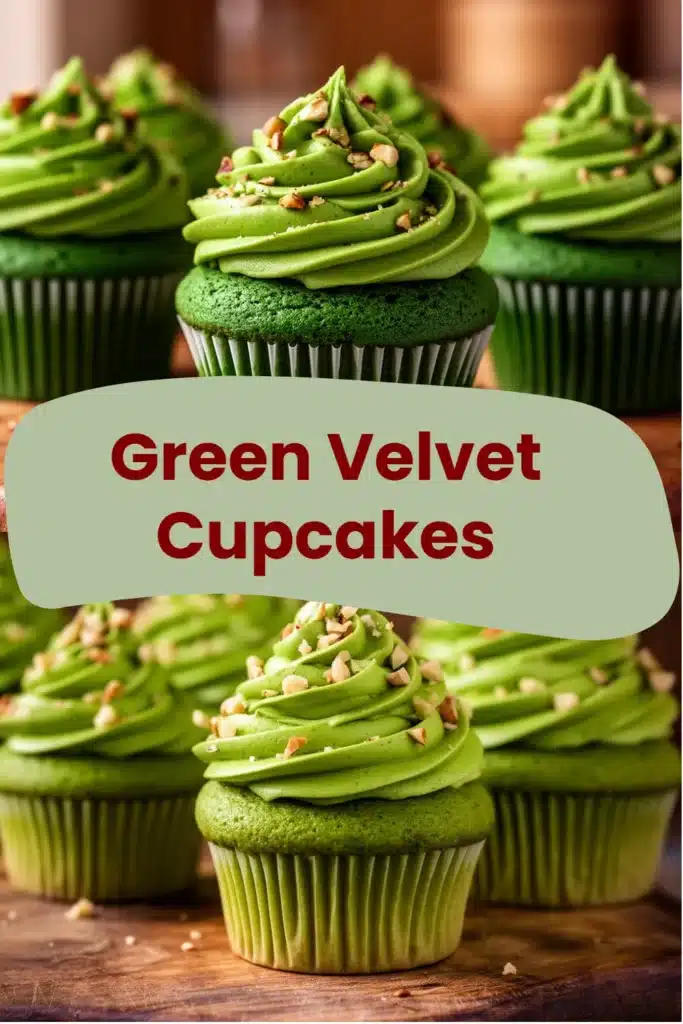
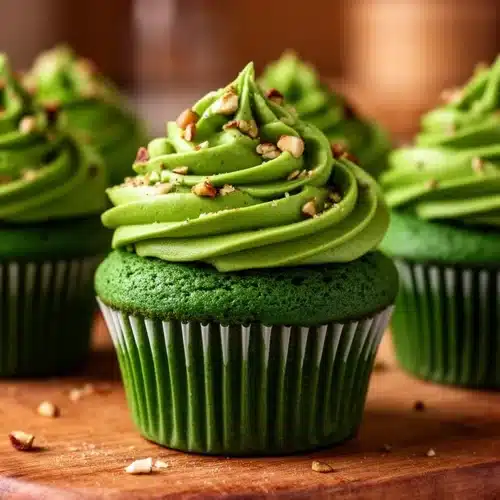
Green velvet cupcakes look fun, taste nostalgic, and make people ask questions like, “Did you dye these or did a leprechaun bake them?” I first made these for a last-minute St. Patrick’s Day bake sale, and they vanished faster than my patience for overproofed frosting. If you want a cupcake that’s visually striking, tender, and slightly chocolaty, you’re in the right place.
I’ll show you the star ingredient that gives the cupcakes their color, explain why this version beats the sad boxed mix, and give clear, friendly steps so you don’t mess it up (trust me, I’ve learned from mistakes). If you love cupcakes and curiosity, check out my take on airy dessert ideas like fluffy Japanese cotton cheesecake cupcakes for inspiration. Ready? Let’s get playful.

Why You’ll Love This Recipe
- Vibrant color without weird flavors. The green pops but the taste stays classic and comforting.
- Moist, tender crumb. The oil + buttermilk combo keeps cupcakes soft for days.
- Subtle chocolate undertone. A touch of cocoa adds depth without stealing the show.
- Simple ingredients. No specialty flours or fancy tools required.
- Crowd-pleaser. People think you sweat way more on presentation than you actually did—score.
Ever wondered why green cupcakes feel more festive? They instantly turn a snack into an event. FYI, you don’t need a bakery degree to nail this.
Ingredients You’ll Need
- 1 1/2 cups all-purpose flour
- 1 cup granulated sugar
- 1/2 cup unsweetened cocoa powder
- 1 teaspoon baking powder
- 1/2 teaspoon baking soda
- 1/2 teaspoon salt
- 1 cup vegetable oil
- 1 cup buttermilk
- 2 large eggs
- 1 teaspoon vanilla extract
- 1 tablespoon green food coloring
I keep the ingredient list short on purpose so you don’t have a grocery scavenger hunt. Green food coloring remains the easiest, most reliable color source; natural options exist but they behave differently in batter.
How to Make (Step-by-Step)
STEP 1
Preheat your oven to 350°F (175°C) and line a cupcake pan with paper liners. I always set the oven early because a consistent oven temp helps the crumb rise evenly. While the oven warms, gather your measured dry and wet ingredients to avoid mid-recipe panic.
STEP 2
In a large mixing bowl, whisk together the flour, sugar, cocoa powder, baking powder, baking soda, and salt. I sift the cocoa to avoid clumps; nobody likes a cocoa surprise. Whisk until the mixture looks uniform and a bit airy.
STEP 3
In a separate bowl, combine the vegetable oil, buttermilk, eggs, vanilla extract, and green food coloring. Beat gently until the color distributes evenly and the mixture looks smooth. Taste? Don’t. Raw eggs are a no-go.
STEP 4
Gradually mix the wet ingredients into the dry ingredients until just combined. I stir by hand or use a low-speed mixer for 15–20 seconds; overmixing ruins the tender crumb. Stop while you still see a few streaks—carryover mixing finishes it.
STEP 5
Fill each cupcake liner about 2/3 full with the batter. I use a cookie scoop for consistency and fewer drips. This yields cupcakes that rise nicely without spilling over.
STEP 6
Bake in the preheated oven for 15–20 minutes or until a toothpick inserted into the center comes out clean. I check at 15 minutes and rotate the pan if my oven runs hot on one side. If the tops spring back slightly, they’re done.
STEP 7
Let them cool completely before frosting. I let cupcakes sit on a wire rack for at least 30 minutes; warm cupcakes melt frosting and create sad, glossy toppers. Use this downtime to make frosting or to pretend you didn’t just eat three cupcake crumbs.
Pro Tips for the Best Results
- Measure flour properly. Spoon it into the cup and level it off to avoid dense cupcakes.
- Room-temp eggs make a difference. They emulsify better and create a fuller texture.
- Use good-quality cocoa. It adds depth without overpowering the green vibe.
- Don’t skip buttermilk. It reacts with baking soda and gives tang and lift.
- Test color gradually. Start with half the green food coloring and add more if needed.
- Cool completely before frosting. I can’t stress this enough—practice self-control.
- Swap oil for melted butter only if you’re okay with slightly firmer crumbs; oil keeps cupcakes moist longer.
I follow these tips and I rarely regret the results. IMO, a little patience here rewards you later with serious street cred.
Fun Variations & Topping Ideas
Variations:
- Matcha twist: Replace cocoa with 1–2 teaspoons of matcha for an earthy green and subtle flavor change.
- Minty: Add 1/2 teaspoon mint extract to the batter for a candy-shop vibe.
- Pistachio: Fold in 1/4 cup finely chopped pistachios for crunch and nuttiness.
Toppings:
- Classic cream cheese frosting with a tiny lemon zest for brightness.
- Chocolate ganache drizzled over cream cheese for drama.
- Whipped mascarpone for a lighter, tangy finish.
- Sprinkles or edible glitter when you want to look like you tried extra hard.
Want a gluten-free option? Use a 1:1 gluten-free flour blend and expect slightly different texture—still delicious but a bit less tender.
Storing and Reheating
Keep cupcakes in an airtight container at room temperature for up to 2 days. If your kitchen lives at summer heat, refrigerate them to prevent frosting spoilage. When you refrigerate, bring cupcakes to room temperature before serving to restore softness.
To reheat refrigerated cupcakes, unwrap them and microwave for 8–10 seconds on medium power; check and add 5-second bursts if needed. I use this trick when I stash cupcakes overnight and want them warm and soft again.
Leftover ideas
- Cupcake trifle: Layer chopped cupcakes with pudding and berries for an instant dessert remix.
- Milkshake: Blend a cupcake with milk and ice cream for a nostalgia-packed shake.
- French toast cupcakes: Dip halves in egg mixture and pan-fry for a fun brunch item.
- Crumb topping: Crumble leftover cupcakes over ice cream or baked fruit.
These ideas save you from throwing food away and make you look like a creative genius.
Frequently Asked Questions (FAQ)
Can I use natural food coloring instead of artificial?
You can, but expect muted color and potential flavor changes. Natural dyes like spinach or spirulina blend differently and sometimes react with cocoa. I use artificial coloring for reliability, but experiment if you care about natural labels.
How many cupcakes does this recipe make?
This batter makes about 12 standard cupcakes. If you want more, double the recipe or use mini liners for about 24 bite-sized treats.
Can I freeze the cupcakes?
Yes. Freeze unfrosted cupcakes in a single layer on a tray, then transfer to a freezer bag for up to 3 months. Thaw in the fridge overnight and bring to room temp before frosting.
My cupcakes sank in the center — what happened?
You overmixed, opened the oven too early, or your leavening measurement went wrong. I learned this the hard way—gentle mixing and accurate measuring fix most sinking issues.
Conclusion
These Green Velvet Cupcakes offer playful color, a tender crumb, and a subtle chocolate kiss that keeps people coming back for more. I think they make any small gathering feel intentional without requiring pastry school-level effort. If you want a similar take from another trusted source, check out this detailed version for inspiration: Green Velvet Cake And Cupcakes – Love From The Oven. Try the recipe, tweak toppings to show off your personality, and please tell me how it went—leave a comment and a rating so I can brag about your success.
Green Velvet Cupcakes
Ingredients
Dry Ingredients
- 1.5 cups all-purpose flour
- 1 cup granulated sugar
- 0.5 cups unsweetened cocoa powder
- 1 teaspoon baking powder
- 0.5 teaspoon baking soda
- 0.5 teaspoon salt
Wet Ingredients
- 1 cup vegetable oil
- 1 cup buttermilk
- 2 large eggs
- 1 teaspoon vanilla extract
- 1 tablespoon green food coloring
Instructions
Preparation
- Preheat your oven to 350°F (175°C) and line a cupcake pan with paper liners.
- In a large mixing bowl, whisk together the flour, sugar, cocoa powder, baking powder, baking soda, and salt.
- In a separate bowl, combine the vegetable oil, buttermilk, eggs, vanilla extract, and green food coloring. Beat gently until smooth.
- Gradually mix the wet ingredients into the dry ingredients until just combined.
- Fill each cupcake liner about 2/3 full with the batter.
Baking
- Bake in the preheated oven for 15–20 minutes or until a toothpick inserted into the center comes out clean.
- Let them cool completely before frosting.