Have you ever wanted a cookie that says “I celebrate St. Patrick’s Day” without taste-testing your entire pantry for mint toothpaste? I do—every year I chase that perfect soft, buttery cookie with a gentle green hue and just enough sparkle to feel festive. The star ingredient here is simple: good vanilla and a touch of almond extract to make the flavor pop. Today I’ll show you what you’ll get: an easy-to-follow recipe, tips that actually work, fun variations, and answers to the questions you didn’t know you’d ask.
If you like cozy baking and playful cookies (and if you’ve ever eyed a shamrock-shaped cutter and thought, “challenge accepted”), you’ll enjoy these. FYI, I once made an entire batch in shamrock form and my neighbor asked if I had hired a leprechaun. True story. Also, if you love experimenting with cookie textures, you might enjoy checking out this tasty twist on soft cookies like my favorite brown butter marshmallow cookies for inspiration.
Why You’ll Love This Recipe
- Quick and forgiving — these cookies don’t require chilling (unless you want to), so you get warm cookies faster.
- Soft and tender texture — the butter and sugar ratio creates a melt-in-your-mouth bite.
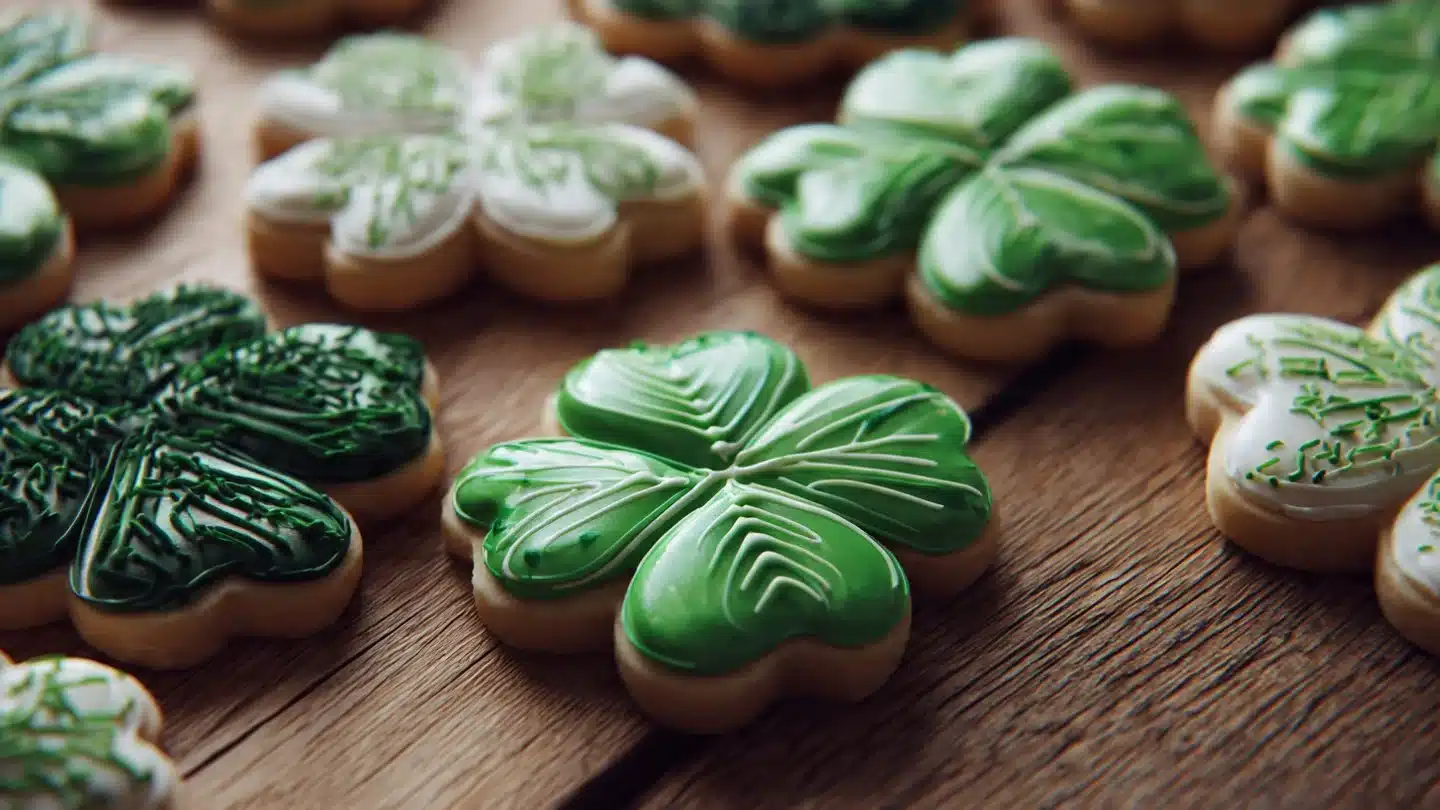
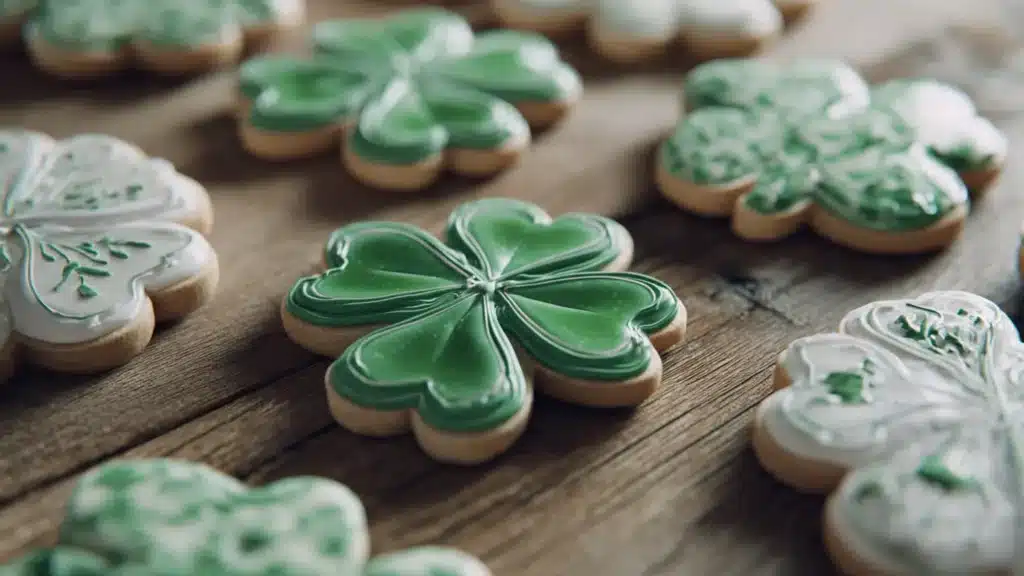
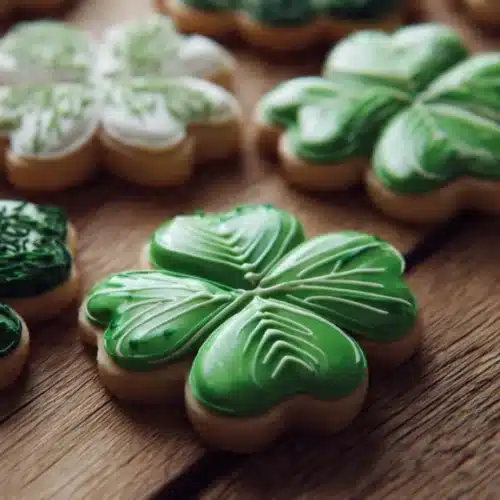
- Customizable color and sparkle — a dab of food coloring and sprinkles make them festive without overpowering flavor.
- Kid-friendly and party-ready — they hold shape well if you use cutters, and they travel fine (if you don’t eat them all en route).
- Beginner-friendly technique — no fancy equipment required.
Ingredients You’ll Need
- 2 3/4 cups all-purpose flour
- 1 teaspoon baking soda
- 1/2 teaspoon baking powder
- 1 cup unsalted butter, softened
- 1 1/2 cups white sugar
- 1 egg
- 1 teaspoon vanilla extract
- 1/2 teaspoon almond extract
- 1/4 teaspoon green food coloring
- 1/4 teaspoon salt
- Sprinkles or edible glitter (optional)
Yes, that’s it. Short list, big payoff. Salt matters here—don’t skip it. It balances the sweetness and brings out the vanilla and almond notes.
How to Make (Step-by-Step)
1. Preheat the oven to 375°F (190°C).
Turn on the oven before you do anything else. I always do this first because I hate waiting, and ovens like to pretend they don’t exist until you threaten them with time.
2. In a bowl, mix flour, baking soda, and baking powder. Set aside.
Whisk the dry ingredients together. This ensures even leavening and prevents pockets of baking soda in the final dough.
3. In a large bowl, cream together the butter and sugar until smooth.
Use a hand mixer, stand mixer, or aggressive forearm action (if you enjoy arm workouts). Cream until the mixture looks light and slightly fluffy—about 2-3 minutes.
4. Beat in the egg, vanilla, almond extract, and green food coloring.
Add the green food coloring gradually until you get a hue you like. Don’t overdo the coloring—a little goes a long way.
5. Gradually blend the dry ingredients into the creamed mixture.
Stir until just combined. Overmixing makes cookies tough. I learned that the hard way during a phase I now call “the brick cookie era.”
6. Roll rounded teaspoonfuls of dough into balls, and place onto ungreased cookie sheets. Flatten each ball slightly and sprinkle with sprinkles or glitter, if desired.
If you want shamrock shapes, roll the dough between parchment sheets to about 1/4 inch thickness and cut with cutters. Otherwise, dough balls work fine and give a classic dome.
7. Bake 8 to 10 minutes in the preheated oven, or until golden.
Keep an eye on them—baking eight minutes will give you softer centers; ten minutes will edge toward golden and slightly crisp edges.
8. Cool on wire racks.
Let cookies cool at least five minutes on the sheet, then move to a rack. If you try to eat them hot from the tray, you will regret nothing, but your teeth might disagree.
Ingredient and Method:
- Ingredient: The blend of vanilla and almond is the flavor backbone.
- Method: Creaming butter and sugar properly gives you the texture you want.
Pro Tips for the Best Results
- Measure flour correctly: spoon it into your cup and level off. Too much flour makes dry cookies.
- Soft butter = soft cookies: don’t melt it; use softened butter for proper creaming.
- Color control: gel food coloring gives vibrant hue without watering down the dough.
- Chill if you want thicker cookies: 20–30 minutes in the fridge helps if your dough feels too soft.
- Use parchment or silicone mats: they prevent sticking and make clean-up easier.
- Swap sugar textures (experimental): try a mix of white and light brown sugar for a slightly chewier bite. I tried it once—surprising win. IMO, brown sugar nudges the flavor into grown-up territory.
Fun Variations & Topping Ideas
Variations:
- Add 1/2 cup chopped white chocolate for a sweet, creamy note.
- Fold in 1/2 cup crushed mint candies for minty shamrock vibes.
- Replace almond extract with lemon zest for a bright twist.
Toppings:
- Classic sprinkles for that Instagram-ready look.
- Edible glitter for party drama (don’t inhale it; it’s glitter, not glitter-flavored magic).
- A tiny dollop of green-tinted vanilla icing to emphasize the shamrock center.
Storing and Reheating
Store cookies in an airtight container at room temperature for up to 4 days. For longer life, freeze the baked cookies in a single layer for an hour, then transfer to a freezer bag; they’ll keep for up to 3 months.
To reheat:
- Microwave: 8–10 seconds for a soft, warm cookie (watch out—steam burns are real).
- Oven: 5 minutes at 300°F (150°C) for a gentle refresh that brings back the fresh-baked texture.
- Thaw frozen cookies at room temperature for 30 minutes before reheating if you want that just-out-of-the-oven feel.
Leftover ideas
- Crumble cookies over vanilla ice cream for instant dessert upgrade.
- Use crumbs as a crust for a mini cheesecake.
- Turn them into sandwich cookies with a layer of buttercream between two pieces—because why not double the joy?
Frequently Asked Questions (FAQ)
How do I make these cookies more green without adding flavor from the food coloring?
Use gel food coloring and add it sparingly. Gel adds color without extra liquid, so it keeps the dough texture intact.
Can I substitute almond extract?
Yes, use an equal amount of additional vanilla or swap for a tiny splash of lemon extract for a citrus twist.
Do these keep well for shipping?
They do. Pack them in layers with parchment paper and use a sturdy container. Add a little note telling the recipient to enjoy within a week.
Can I freeze the dough?
Absolutely. Scoop the dough onto a sheet and freeze the balls, then bag them. Bake from frozen—add a minute or two to the bake time.
Conclusion
These Shamrock Cookies deliver on flavor, texture, and a bit of festive flair without demanding hours of fuss. They bake fast, taste familiar, and look adorable, making them perfect for last-minute parties or a cozy baking afternoon with friends. If you want a slightly fancier reference for classic shamrock-style cookies from a well-loved baking site, check out this recipe for a similar take on the theme at St. Patrick’s Day Shamrock Cookies – Sally’s Baking. Try the recipe, leave a comment with your favorite variation, and drop a rating—my kitchen loves feedback and my neighbor loves free cookies.

Shamrock Decorated Cookies
Ingredients
Dry Ingredients
- 2 3/4 cups all-purpose flour Measure correctly for best results.
- 1 teaspoon baking soda
- 1/2 teaspoon baking powder
- 1/4 teaspoon salt Balances sweetness and enhances flavor.
Wet Ingredients
- 1 cup unsalted butter, softened Do not melt; use softened butter for proper creaming.
- 1 1/2 cups white sugar Consider mixing with light brown sugar for a chewier cookie.
- 1 large egg
- 1 teaspoon vanilla extract
- 1/2 teaspoon almond extract Can be substituted with lemon zest.
- 1/4 teaspoon green food coloring Use gel for vibrant color without extra liquid.
Optional Toppings
- to taste sprinkles or edible glitter For decoration.
Instructions
Preparation
- Preheat the oven to 375°F (190°C).
- In a bowl, mix flour, baking soda, and baking powder. Set aside.
- In a large bowl, cream together the butter and sugar until smooth.
- Beat in the egg, vanilla, almond extract, and green food coloring.
- Gradually blend the dry ingredients into the creamed mixture until just combined.
Baking
- Roll rounded teaspoonfuls of dough into balls, place onto ungreased cookie sheets, and flatten slightly. Sprinkle with sprinkles or glitter if desired.
- Bake for 8 to 10 minutes in the preheated oven, or until golden.
- Cool on wire racks for at least five minutes before serving.