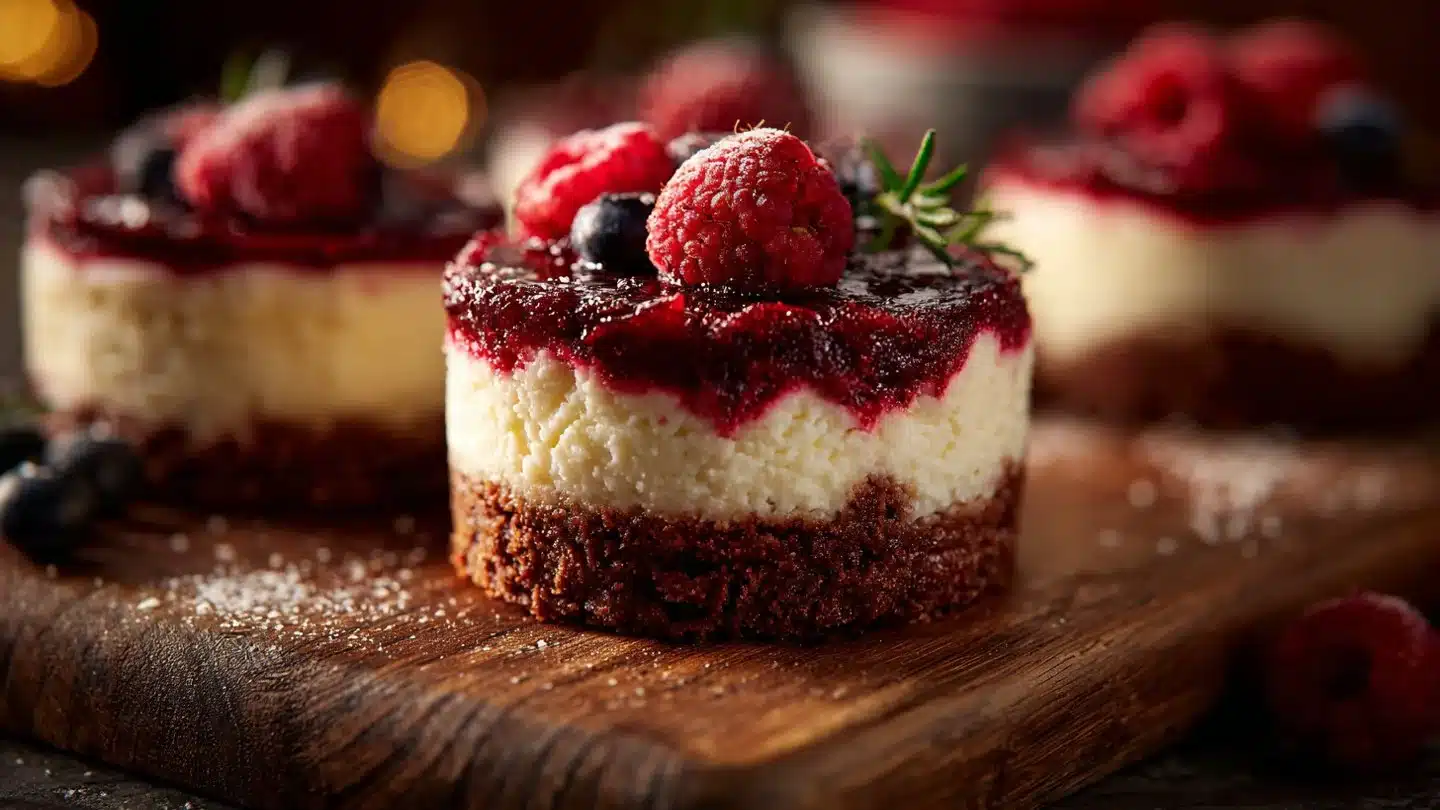
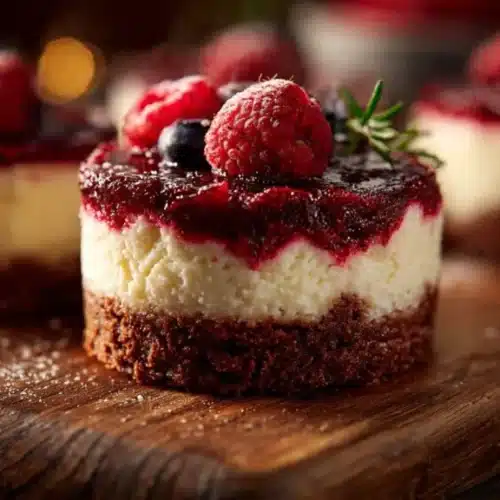
Hey there, dessert lover! 🍰 If you’ve ever felt the love for red velvet cake but wished it could fit in your hand, then I’ve got a treat for you: Mini Red Velvet Cheesecakes! These adorable little bites are the ultimate blend of luscious cream cheese and that iconic red velvet flavor. Sound good? Seriously, what’s better than a dessert that’s both cute and delicious?
In this article, I’ll guide you through why these mini cheesecakes deserve a spot on your dessert table (or your secret snack stash) and how you can whip them up in no time. Trust me; your taste buds will thank you. 🙌
Why You’ll Love This Recipe
Let’s break it down; here’s why you’re going to want to make these mini delights:
- Easy to Make: You don’t need to be a baking wizard to pull these off!
- Perfect for Any Occasion: Birthdays, Valentine’s Day, or just because—these are a hit!
- Portion-Controlled: You can feel a little better about indulging because they’re mini… right?
- Gorgeous Presentation: They look like they came from a fancy bakery. You’ll be the star of the dessert table!
- Combines Two Favorites: Who doesn’t love red velvet and cheesecake? It’s a match made in dessert heaven.
Ingredients You’ll Need
To whip up these mini morsels of joy, here’s your grocery list:
- 1 cup all-purpose flour
- ¼ cup + 1 tablespoon unsweetened cocoa powder
- ¾ cup salted sweet cream butter, melted and cooled
- 1¼ cups granulated sugar
- 1 tablespoon red gel food color (preferably Sunny Side Up Bakery brand)
- 2 teaspoons pure vanilla extract
- 2 large eggs, room temperature and beaten
- 8 ounces cream cheese, softened
- ¼ cup granulated sugar (for the cheesecake filling)
- 1 teaspoon pure vanilla extract (for the cheesecake filling)
- 1 large egg yolk (for the cheesecake filling)
How to Make (Step-by-Step)
Now, let’s get cooking! Here’s how to create these mini delights:
STEP 1: Preheat and Prep
Preheat your oven to 350°F and spray a mini muffin pan with nonstick cooking spray. Pro tip: Using a silicone pan can make this part even easier!
STEP 2: Mix Dry Ingredients
In a small bowl, whisk together flour and cocoa powder. This step is crucial for even distribution of ingredients—don’t skip it!
STEP 3: Combine the Wet Ingredients
In a medium bowl, combine melted butter, sugar, food color, vanilla, and the beaten eggs until everything is well blended. Get ready for the glorious color!
STEP 4: Join Forces
Gradually stir the flour mixture into the wet ingredients until just combined. No over-mixing here—let’s keep it light and airy!
STEP 5: Prepare the Cheesecake Filling
In another bowl, beat the cream cheese until it’s smooth. Mix in sugar, vanilla, and the egg yolk. This is the point where your kitchen starts smelling like a dream.
STEP 6: The Assembly Line
In your muffin pan, add a spoonful of the red velvet batter and pipe that luscious cheesecake filling right into the center. Don’t be shy, give it a good dollop!
STEP 7: Bake
Pop them in the oven and bake for 8-9 minutes. Watch closely; they should be set but still a bit jiggly. After they cool, you can devour them—if you resist the temptation!
Pro Tips for the Best Results
Want to elevate your mini cheesecakes even more? Here are some pro tips you might find useful:
- Use Room Temperature Ingredients: This helps everything blend easily and results in a smoother texture.
- Experiment with Food Coloring: Want them bright red? Go for it! Or tone it down if you prefer.
- Don’t Overbake: These little gems keep baking even after you take them out. Keep an eye on them!
- Chill Before Serving: These cheesecakes taste even better after they’ve cooled in the fridge for a bit.
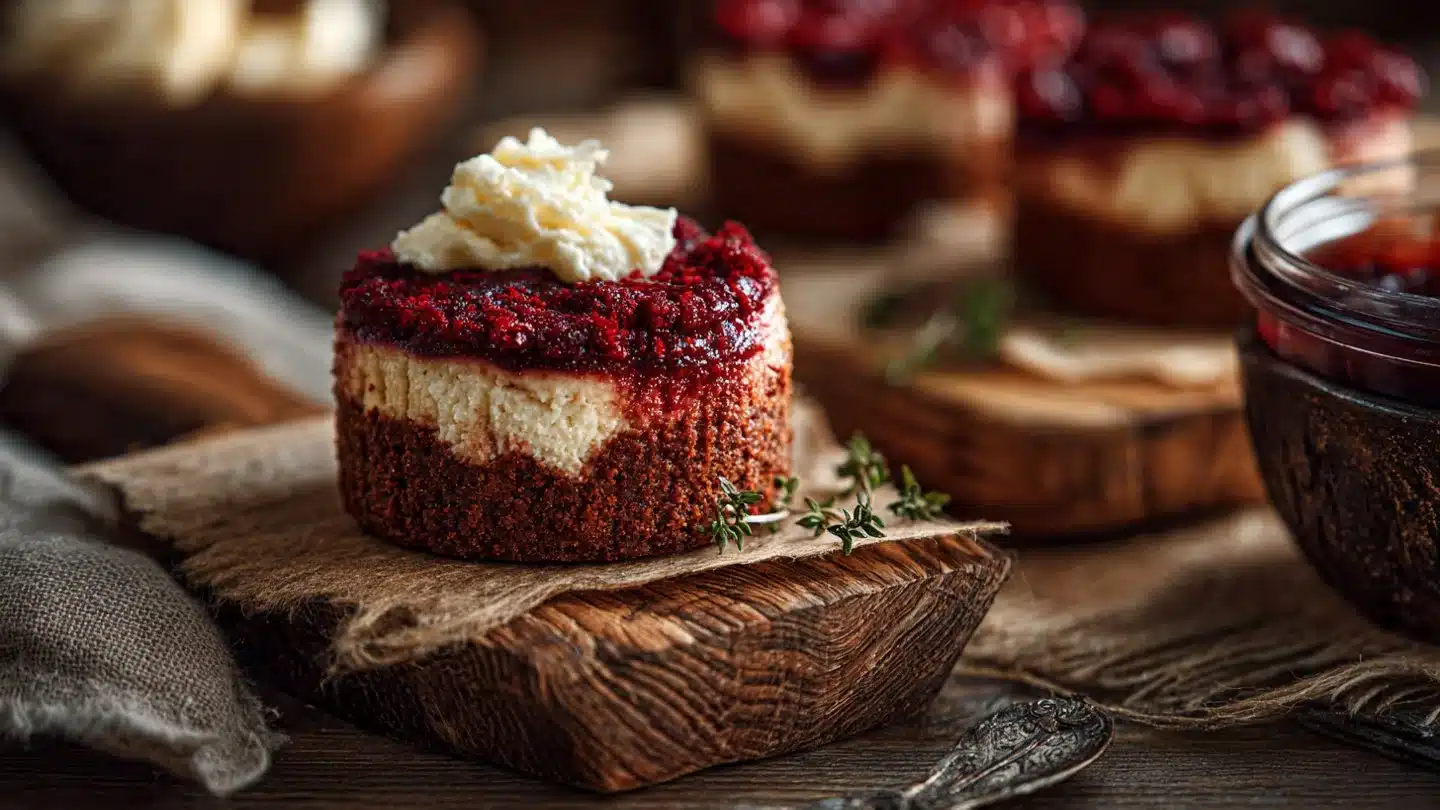
Fun Variations & Topping Ideas
Variations:
- Chocolate Chip Cheesecake: Add mini chocolate chips into the cheesecake filling for extra sweetness.
- Nutty Surprise: Incorporate crushed nuts for a crunchy texture.
- Stuffed: Try stuffing them with raspberry or strawberry jam for a fruity surprise.
Toppings:
- Whipped Cream: Always a classic and visually appealing topping. Who doesn’t love a cloud of whipped cream?
- Sprinkles: Go wild with colorful sprinkles for a festive look.
- Cream Cheese Frosting: Because extra frosting is always a good idea!
Storing and Reheating
Storing:
These mini cheesecakes can be stored in an airtight container in the fridge for up to 5 days. Just try not to eat them all in one go!
Reheating:
If you want them warm (which is a delightful way to enjoy desserts), pop them in the microwave for about 10-15 seconds. Don’t overdo it; nobody wants a rubbery cheesecake!
Leftover Ideas
Leftover cheesecakes? Yes, please! You can try:
- Parfait Layering: Layer leftover cheesecake crumbles with whipped cream and berries for a quick dessert.
- Cheesecake Smoothie: Blend bits of cheesecake with milk and ice for a creamy smoothie.
Frequently Asked Questions (FAQ)
How can I make these gluten-free?
Swap the all-purpose flour for a gluten-free blend. With the right one, you won’t even know the difference.
Can I freeze mini cheesecakes?
Absolutely! Just make sure they’re wrapped tightly in plastic wrap. They can be frozen for up to 3 months. Just thaw in the fridge before serving.
Why did my cheesecake sink?
Overbaking or not letting them cool properly can cause sinking—make sure to keep an eye on them.
Can I use other flavors instead of red velvet?
Definitely! You could go for chocolate, vanilla, or even pumpkin spice if you’re feeling festive.
Conclusion
And there you have it—the perfect recipe for Mini Red Velvet Cheesecakes that are sure to satisfy your sweet cravings, bring smiles to your gatherings, and become a beloved recipe in your kitchen. These bites of heaven are tender, creamy, and oh-so-delicious. So, grab your ingredients and start baking!
Before you dash off to the kitchen, drop a comment below and let me know how your mini cheesecakes turn out. And hey, don’t forget to leave a rating! You’ll be doing your baking buddies a solid. Now, go get your bake on! 🧁

Mini Red Velvet Cheesecakes
Ingredients
For the Red Velvet Batter
- 1 cup all-purpose flour
- ¼ cup unsweetened cocoa powder
- ¾ cup salted sweet cream butter, melted and cooled
- 1¼ cups granulated sugar
- 1 tablespoon red gel food color (preferably Sunny Side Up Bakery brand)
- 2 teaspoons pure vanilla extract
- 2 large eggs, room temperature and beaten
For the Cheesecake Filling
- 8 ounces cream cheese, softened
- ¼ cup granulated sugar (for the cheesecake filling)
- 1 teaspoon pure vanilla extract (for the cheesecake filling)
- 1 large egg yolk (for the cheesecake filling)
Instructions
Preparation
- Preheat your oven to 350°F and spray a mini muffin pan with nonstick cooking spray.
- In a small bowl, whisk together flour and cocoa powder.
Mixing
- In a medium bowl, combine melted butter, sugar, food color, vanilla, and the beaten eggs until everything is well blended.
- Gradually stir the flour mixture into the wet ingredients until just combined.
- In another bowl, beat the cream cheese until it’s smooth. Mix in sugar, vanilla, and the egg yolk.
Assembly
- In your muffin pan, add a spoonful of the red velvet batter and pipe that cheesecake filling right into the center.
- Pop them in the oven and bake for 8-9 minutes.
Cooling
- Allow them to cool before serving.