
You want cookies that scream St. Patrick’s Day without looking like a craft project gone rogue, right? I’ve spent more afternoons than I’ll admit making shamrock cookies that actually look charming and not like a toddler took over the piping bag. The star ingredient? Good butter—it makes these cookies tender and buttery, which balances the sweet royal icing perfectly.
I’ll walk you through the whole thing: what you need, step-by-step method, pro tips so your shamrocks look like they belong on a bakery shelf, and fun variations if you feel like getting fancy (or lazy, I won’t judge). If you love trying cookie recipes, check out my take on brown butter marshmallow cookies—they pair nicely with a mug of tea while you decorate.
Why You’ll Love This Recipe
- Simple ingredients you probably already keep in the pantry. No exotic stuff here.
- Kid-friendly decorating that still looks stylish enough for adults to brag about.
- Fast bake time — you don’t need to camp in the kitchen all day.
- Versatile base: use the dough for cutouts beyond shamrocks if you get bored.
- Consistent results even if your oven has mood swings (been there).
Ingredients You’ll Need
- 2 3/4 cups all-purpose flour
- 1 teaspoon baking soda
- 1/2 teaspoon baking powder
- 1 cup unsalted butter, softened
- 1 1/2 cups white sugar
- 1 egg
- 1 teaspoon vanilla extract
- 1 teaspoon almond extract
- 3 drops green food coloring
- Royal icing for decoration
Yes, that’s it. Butter and sugar lead the charge, and the little almond extract whisper elevates the flavor in a way people don’t expect but definitely appreciate.
How to Make (Step-by-Step)
1. Preheat the oven to 375°F (190°C).
Get your oven warmed up so you don’t waste time later. I preheat at the start because I always manage at least one small disaster if I get distracted.
2. In a small bowl, stir together flour, baking soda, and baking powder. In a large bowl, cream together the butter and sugar until smooth.
Mix the dry stuff first to keep lumps out. Then beat the butter and sugar until they look pale and a little proud—about 2-3 minutes with a hand mixer.
3. Beat in the egg, vanilla extract, almond extract, and green food coloring. Gradually blend in the dry ingredients.
Add the egg and extracts; then drop in the three drops of green food coloring. Mix until you get a uniform pastel green dough. Add dry mix slowly so the dough stays soft and workable.
4. Roll rounded teaspoonfuls of dough into balls, and place onto ungreased pans. Flatten each ball with the bottom of a glass, and sprinkle with sugar.
I like to space them about 2 inches apart. Press gently with a glass for an even thickness—this helps them bake evenly.
5. Bake 8 to 10 minutes in the preheated oven, or until golden.
Keep an eye on the edges. They should get a hint of gold but stay soft in the middle. Overbake and you’ll lose that tender chew.
6. Let cool on wire racks.
Don’t rush this. If you try to ice warm cookies, the royal icing slides around like a mini Toboggan run. Let them sit until they feel room temperature.
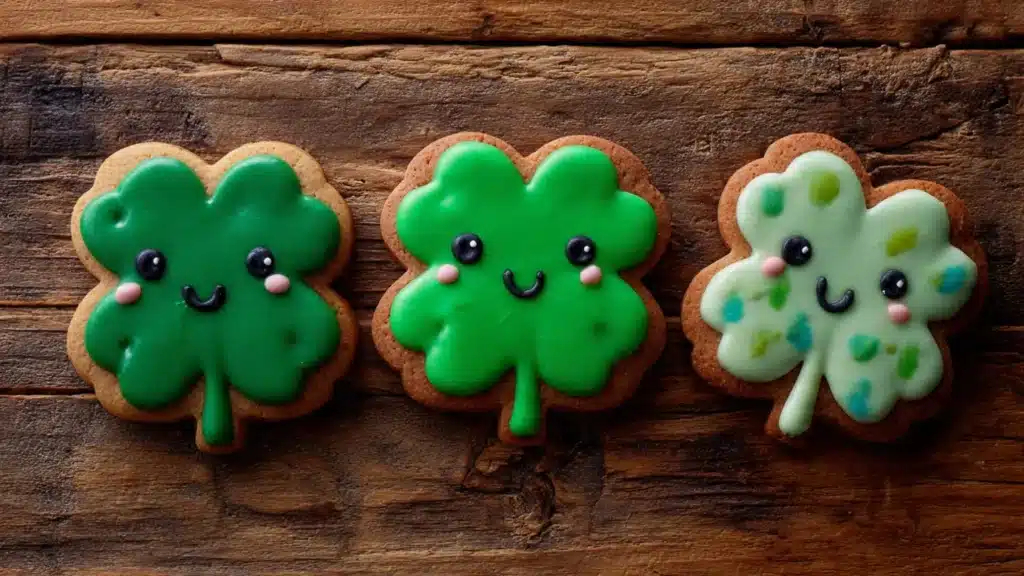
7. Once cooled, decorate with royal icing to create shamrock designs.
Use a piping bag or a zip-top bag with a tiny corner snipped. Outline first, flood second, then use a toothpick to nudge icing into corners. For stems, a small leaf tip does wonders.
Pro Tips for the Best Results
- Chill the dough if your kitchen runs warm; it makes shaping easier and prevents spreading.
- Use room-temperature butter so the dough creams properly and traps air for lift.
- Sift the flour when you measure to avoid lumps and get a lighter cookie.
- Weigh ingredients if you want precision—cups lie sometimes.
- Thin royal icing with a drop or two of water for flooding; keep a thicker consistency for outlines.
- Store decorated cookies in a single layer or separate layers with parchment to avoid smudges.
- FYI: I use a small paintbrush to add edible gold dust for a luxe finish occasionally. Impresses guests every time.
Fun Variations & Topping Ideas
Variations:
- Add zest of one lemon to the dough for a citrusy lift.
- Swap almond extract for maple extract to get a warm, cozy note.
- Make mini sandwich cookies: spread a thin layer of vanilla buttercream between two shamrocks.
Toppings:
- Sprinkles (green and gold) for instant party mode.
- Edible glitter for adult-friendly elegance.
- Crushed peppermint if you want a sharp contrast—odd but surprisingly tasty.
- Chocolate drizzle for a half-and-half look—green and dark brown look oddly sophisticated.
Storing and Reheating
- Room temperature: Keep cookies in an airtight container for up to 3 days. Layer with parchment to stop sticking.
- Refrigerator: If your decorated cookies contain perishable fillings, refrigerate them in airtight containers up to 5 days. Let them come to room temperature before serving.
- Freezer: Freeze undecorated dough balls or baked cookies (no icing) up to 3 months. Thaw in the fridge overnight, then bring to room temp before decorating.
- Reheating: I don’t recommend microwaving decorated cookies—the icing hates it. If you warm undecorated cookies, heat them in a 300°F oven for 3–4 minutes to revive that fresh-baked vibe.
Leftover ideas
Turn stale-ish cookies into a dessert trifecta:
- Crush cookies and layer with pudding and whipped cream for a quick parfait.
- Turn them into ice cream mix-ins—break into chunks and fold into softened vanilla.
- Make cookie crumbs as a crunchy topping for yogurt or smoothies.
Frequently Asked Questions (FAQ)
How do I keep the royal icing from cracking?
Keep the humidity stable and avoid stacking freshly iced cookies. Use a slightly more fluid flood consistency and let each layer dry fully before adding details.
Can I make the dough ahead of time?
Yes. Chill the dough up to 48 hours before shaping and baking. You can also freeze dough balls and bake from frozen, adding an extra minute or two.
What if my icing is too runny or too thick?
Add tiny amounts of powdered sugar to thicken or a drop of water to thin. Work slowly—you can always thin more but you can’t thicken quickly without adding more sugar.
Do I need special tools to do this?
Nope. A rolling pin, cookie cutter, piping bag (or zip-top bag), and a couple of tips or toothpicks will do. Fancy tools help but don’t determine the result.
Conclusion
If you want cute, festive, and reliably tasty shamrock decorated cookies, this recipe delivers without drama. The dough stays forgiving, the baking time stays short, and the decorating lets you be as simple or fancy as you feel. Want a tried-and-true visual guide or another take on shamrock sugar cookies? Check out this great tutorial: Easy Shamrock Sugar Cookies for St. Patrick’s Day —it pairs well with this recipe and gives you extra decoration ideas.
Love these cookies? Leave a comment and a rating below—tell me whether you went classic green or glittered them up. I promise I read every single comment (and I’ll steal any brilliant decoration hacks). 🙂

Shamrock Sugar Cookies
Ingredients
For the cookie dough
- 2 3/4 cups all-purpose flour Sift when measuring for lighter cookies.
- 1 teaspoon baking soda
- 1/2 teaspoon baking powder
- 1 cup unsalted butter, softened Use room temperature butter for best results.
- 1 1/2 cups white sugar
- 1 large egg
- 1 teaspoon vanilla extract
- 1 teaspoon almond extract Can be substituted with maple extract.
- 3 drops green food coloring
For decoration
- to taste amount Royal icing Prepare for decorating the cookies.
Instructions
Preparation
- Preheat the oven to 375°F (190°C).
- In a small bowl, stir together flour, baking soda, and baking powder.
- In a large bowl, cream together the butter and sugar until smooth and pale, about 2-3 minutes.
- Beat in the egg, vanilla extract, almond extract, and green food coloring.
- Gradually blend in the dry ingredients until a uniform pastel green dough forms.
- Roll rounded teaspoonfuls of dough into balls, place onto ungreased pans, and flatten with a glass.
Baking
- Bake for 8 to 10 minutes in the preheated oven, or until golden around the edges.
- Let cool on wire racks completely before decorating.
Decorating
- Once cookies are cool, decorate with royal icing to create shamrock designs.